
Design and Sewing Patterns For Leather Jackets and Aprons
Leather jackets and aprons aren’t just for looks, they serve a real purpose. A well-made jacket keeps you warm and stylish, while a leather apron protects against spills, heat, and sharp tools. Whether you’re crafting a custom jacket or sewing an apron, having the right pattern makes the job easier.
In the USA, leather gear is a top choice for professionals and hobbyists alike. Many woodworkers and craftsmen rely on a leather woodworking apron to stay safe and comfortable. If you’re planning to make your own, understanding materials, tools, and sewing techniques will help you create something that lasts.
Selecting the Right Leather
Choosing the right type of leather is crucial for ensuring comfort, durability, and ease of work. Full-grain leather is the highest quality option, known for its natural strength and ability to develop a rich patina. If you need something softer and easier to stitch, top-grain leather is a great alternative while still being durable.
For beginners, split-grain leather is more budget-friendly and flexible, making it easier to work with. The thickness of the leather also matters. Thicker leather (6-8 oz) is best for aprons that need extra protection, while lighter leather (3-5 oz) is ideal for comfortable jackets. Always choose leather that is free from cracks, wrinkles, or imperfections to ensure a high-quality final product.
Essential Tools and Materials
Working with leather requires specific tools to achieve precision and durability. Investing in the right supplies will make the process smoother and result in a professional finish. Below are the must-have tools:
- A sharp rotary cutter or utility knife ensures clean and accurate cuts.
- An awl, heavy-duty needles, and waxed thread help create strong, long-lasting seams.
- A ruler and measuring tape guarantee correct proportions and symmetrical pieces.
- Buckles, rivets, D-rings, and grommets provide strength and adjustability.
- Pre-made patterns or custom paper outlines help maintain accuracy when cutting.
Designing Your Leather Apron or Jacket
Before cutting into the leather, you need a clear design plan to avoid mistakes and wasted material. Start by deciding the purpose of your project, whether you need a durable leather apron for heavy-duty work or a stylish, fitted leather jacket.
For an apron, consider the length and coverage needed for your work. If you’re handling tools, pockets should be placed strategically for easy access. Jackets require a well-fitted design, so make sure to leave room for layering. A sketch of your design will act as a blueprint, helping you stay consistent throughout the crafting process.
Creating or Choosing a Sewing Pattern
A sewing pattern ensures that every piece is cut precisely, resulting in a well-fitting final product. Beginners can find custom leather jacket patterns online or use a pre-made apron template for accuracy. If you want a personalized fit, follow these steps:
Take precise measurements:
For aprons, measure chest width, waist size, and desired length. For jackets, include sleeve length and shoulder width.
Draw your pattern on paper:
Outline the apron or jacket, marking pocket placements, straps, and seams.
Cut the pattern carefully:
Double-check measurements before transferring the template onto the leather.
Step-by-Step Construction Process
Step 1: Cutting the Leather
Lay your leather flat on a clean surface and secure your pattern with weights or clips. Using a rotary cutter or sharp knife, cut along the outlined edges with slow, controlled movements to prevent jagged edges. If working with thick leather, make multiple light cuts instead of one deep cut for smoother results.
Step 2: Punching Holes for Stitching
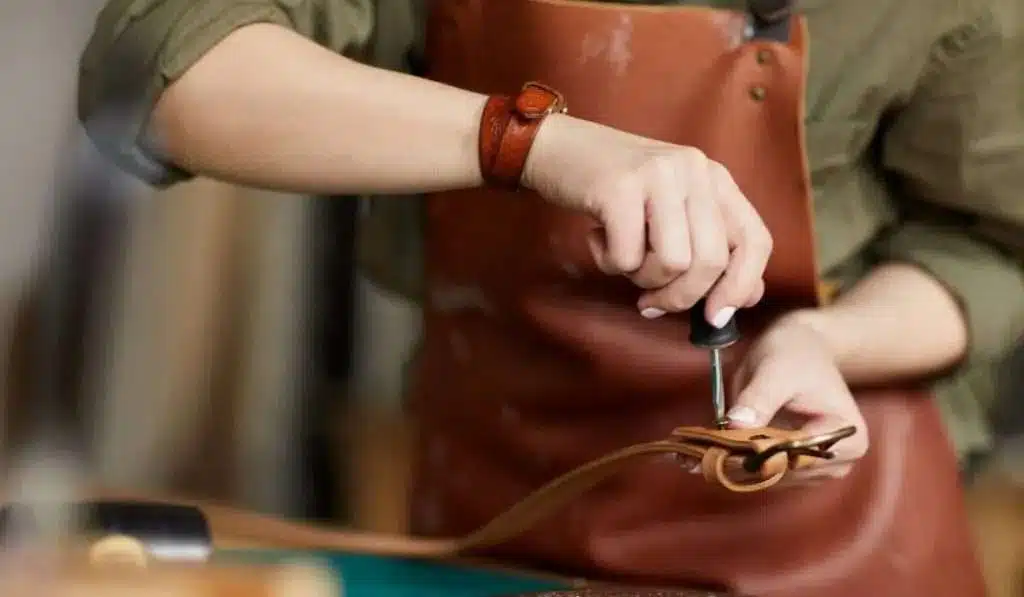
Since leather is tough, it cannot be stitched directly like fabric. Use a hole punch or an awl to create evenly spaced holes along the stitching lines. This ensures easy hand-sewing and prevents the leather from tearing under tension.
Step 3: Assembling and Stitching
For jackets, begin by attaching the sleeves and sewing the front and back panels together. Aprons require the pockets and straps to be stitched on first before assembling the body. A saddle stitch is recommended as it provides exceptional strength and durability compared to a standard sewing machine stitch.
Step 4: Adding Hardware and Adjustments
Once the stitching is complete, attach buckles, rivets, or grommets using a mallet and setting tool. These reinforcements make the apron or jacket adjustable, durable, and stylish.
Step 5: Finishing Touches
To ensure a polished final look, smooth out rough edges with fine sandpaper and apply a leather conditioner to keep the material soft. Burnishing the edges with beeswax or an edge slicker adds a professional finish, making your handcrafted leather piece look refined.
Customization and Personalization
Leather aprons and jackets can be customized to reflect individual styles. Consider these options:
- Embossing and engraving: Stamp initials, logos, or intricate patterns into the leather.
- Decorative stitching: Use contrast thread colors to create an eye-catching design.
- Unique hardware choices: Select vintage, brass, or brushed metal finishes for a distinctive look.
Conclusion
Making your leather apron or jacket is a rewarding process that allows you to combine craftsmanship with personal style. Whether you’re following a DIY leather jacket design or crafting a custom leather apron pattern, patience and attention to detail will help you create a high-quality, long-lasting piece.
By using premium materials, precise techniques, and proper finishing methods, you can create a durable, handcrafted leather item that enhances your wardrobe or workspace. Start today and enjoy the satisfaction of wearing something truly unique.