
Pick the Best AI Photo Editor for Daily Use
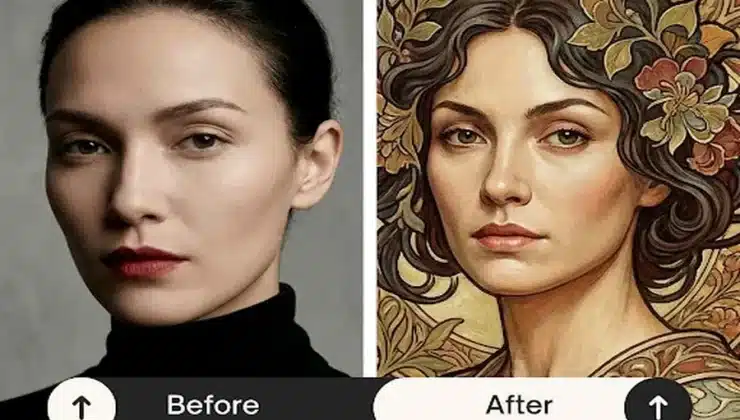
Finding the right software to fix your pictures can feel overwhelming. You have hundreds of apps claiming to be the best. Most people just want to remove a stray person from the background or brighten a dark face. You do not need a degree in graphic design to get professional results anymore.
Using a dedicated ai photo editor allows you to skip the steep learning curve of traditional software. These tools use smart technology to understand what is in your image. They can identify sky, skin, and objects automatically. This saves you hours of manual clicking and dragging.
Technology has changed the way we handle photography. In the past, you had to spend years learning how to use layers and masks. Now, a computer program can do those tasks for you in a single click. This guide will help you navigate the many options available today.
Step 1: Identify Your Primary Editing Goals
Before you download any software, you must think about what you do most often. Every person has different needs when it comes to their image. Some people focus on selfies and portraits for social media. Others need to clean up product photos for an online shop or a personal website.
If you only post to Instagram, you might want a mobile app with quick filters. These apps are designed for speed and ease. If you are working on a blog or a professional project, a desktop version is usually better. Desktop tools offer more control over the fine details of an image.
You should also consider how many photos you edit. If you only fix one or two pictures a month, a free web tool is perfect. If you are a photographer who takes hundreds of shots, you need something that can handle batch processing. Knowing your volume helps you avoid paying for features you do not need.
Step 2: Evaluate Core AI Features
Not all tools are built the same way. Some focus on one specific task while others try to do everything at once. You should look for a tool that offers background removal as a standard feature. This is one of the most common needs for everyday editing. It allows you to place your subject in a completely new environment.
Another essential feature is an object removal tool. This helps you get rid of trash cans, power lines, or strangers who ruin your shots. The AI looks at the pixels around the object and fills in the gap naturally. This used to take hours of careful cloning, but now it happens instantly.
You should also look for image upscaling. Sometimes you have a great photo that is just too small to print or use as wallpaper. AI upscalers can increase the size of an image without making it look blurry. They add detail where it is missing, which is something traditional resizing cannot do.
Step 3: Test the User Interface and Speed
A good tool should be easy to navigate from the moment you open it. You should be able to find the main buttons within seconds. If the screen looks cluttered with icons you do not understand, it might not be the right fit for you. Look for a clean layout that puts the preview of your photo front and center.
Speed is just as important as the layout. The AI should process your changes in a few seconds. If you have to wait a long time for every single edit, you will get frustrated quickly. High-quality tools use powerful servers to make sure your edits happen almost instantly.
Check if the tool offers a side-by-side comparison. This allows you to see the original photo next to your edited version. It is a simple feature, but it helps you stay on track. You can see if you have changed the photo too much and need to dial back the effects.
Step 4: Consider Platform and Accessibility
Decide if you want to edit on your phone, tablet, or computer. Some services are web-based, which means you do not have to install any software. This is a great option if you switch between different devices often. You can start an edit on your laptop and finish it on your phone.
Other tools are standalone apps that you download to your hard drive. These often have more power because they use your computer hardware. However, they can take up a lot of storage space. Make sure the tool you choose works with the file types your camera produces, such as JPEG or PNG.
Cloud storage is another factor to think about. Some editors save your photos online so you never lose your work. This is very helpful if your device crashes or if you lose your phone. Just make sure the service has a strong reputation for protecting your data.
Step 5: Compare Pricing and Value
Many AI editors offer a free version with limited features. This is a great way to see if the tool works for you before you spend any money. Some use a subscription model where you pay every month. Others let you buy credits for a certain number of edits.
Think about the long-term cost of the software. If you use it every day, a monthly subscription might be the best value. If you only use it once in a while, a pay-as-you-go system is better. Do not get distracted by flashy marketing. Focus on the features you will actually use.
Always look for a trial period. Most reputable companies will let you try the full version for a few days. Use this time to test the most difficult photos you have. If the AI can handle a dark, blurry photo, it can handle anything.
Feature Comparison for AI Tools
| Feature | What It Does | Best For |
| Background Removal | Deletes the area behind a subject | Product photos and portraits |
| Image Upscaling | Increases the size and clarity | Printing old or small photos |
| Object Eraser | Deletes unwanted items from a scene | Vacation and landscape shots |
| Skin Retouching | Smooths textures and removes spots | Close-up portraits and selfies |
| Color Correction | Fixes lighting and tone issues | Dull or dark photographs |
Tips and Best Practices for AI Editing
Always start with the highest resolution image possible. AI can do a lot of work, but it cannot create detail out of a tiny thumbnail. If your original photo is sharp, the final result will be much better. Avoid using photos that social media apps have already compressed.
Keep your edits subtle to maintain a natural look. It is very easy to go overboard with smoothing skin or boosting colors. If the person in the photo looks like a plastic doll, you have gone too far. Try to keep the original spirit of the photo alive while just cleaning up the flaws.
Save your work in different versions. Never overwrite your original file. You might decide later that you liked the original better, or you might want to try a different editing style. Having a backup ensures that you never lose your memories.
Use the batch processing feature if you have many similar photos. For example, if you took twenty photos in the same dark room, you can apply the same lighting fix to all of them at once. This saves a massive amount of time and keeps the look of your photos consistent.
Pay attention to the edges of your subjects. When you remove a background, sometimes the AI leaves a small outline or a blurry edge. Most tools have a brush that lets you clean up these small mistakes. Taking an extra minute to fix the edges makes the photo look much more professional.
Common Mistakes to Avoid
One big mistake is ignoring the privacy policy of the app. Some free tools might use your uploaded photos to train their computer models. Always read the fine print to see who owns the images after you upload them. Your private photos should stay private.
Another mistake is relying too much on one-click fixes. Even the best AI needs a little guidance from a human. A tool might think a shadow is an object and try to remove it. Always review the work the AI does and make small manual adjustments if something looks wrong.
Do not ignore the lighting. AI can fix colors, but it struggles if the lighting is completely flat or way too bright. Try to take the best photo you can with your camera first. The better the input, the better the output will be. AI is a tool to enhance your work, not a magic wand that fixes every possible error.
Many people forget to check the file format when they export. If you are uploading to a website, you want a file that is small but still looks good. If you are printing, you need a high-quality file, like a TIFF or a high-resolution JPEG. Choosing the wrong format can ruin all the hard work you did during the editing process.
Finally, do not get stuck using only one tool. The world of AI is moving very fast. A tool that was the best last year might be outdated today. Keep an eye on new releases and be willing to try new things. Staying flexible helps you get the best results for your images.
Conclusion
Choosing the right software does not have to be a chore. If you focus on your specific needs and test a few options, you will find the perfect fit. AI technology is here to make your life easier and your photos look better. You can now spend less time sitting at a computer and more time out taking new pictures.
The best editor is the one that you feel comfortable using every day. It should be fast, affordable, and powerful enough to handle your toughest shots. With the right tool in your hand, your everyday photos will look like they were taken by a professional photographer. Start exploring the options today and see how much your photography can improve.